Stable Diffusion is a recently released open source text-to-image AI system that challenges DALL-E by OpenAI. Nowadays OpenAI products are open in name only: aside from client libraries and some other inconsequential things, all the new products by OpenAI (GPT-3, DALL-E 2) are not only proprietary, but also offered in SaaS form only. In constrast with locked-down proprietarism of DALL-E, Stable Diffusion is fully open source and can be self-hosted on a server the end user controls. This is what we are going to do today.
For setting up our own installation of Stable Diffusion, we are going to use Vultr - a cloud provider that is comparable to Digital Ocean, but has an option for GPU servers.
The following assumes that you have Vultr account with some credits and/or a configured payment method. In the “Product” tab press the plus button and choose “Deploy new server”. Out of server types, choose “Cloud GPU”. At the time of writing, cloud GPU instances are only available in New Jersey region.
We choose Debian 11 image because we want to base our setup on vanilla Linux distribution that does rely on ML/data science software being pre-installed (as is the case with Anaconda image and some other options).
When it comes to server size, we choose at least the third option that has 10 GB of VRAM.
We launch the server and watch the console until cloud-init finishes setting everything up.
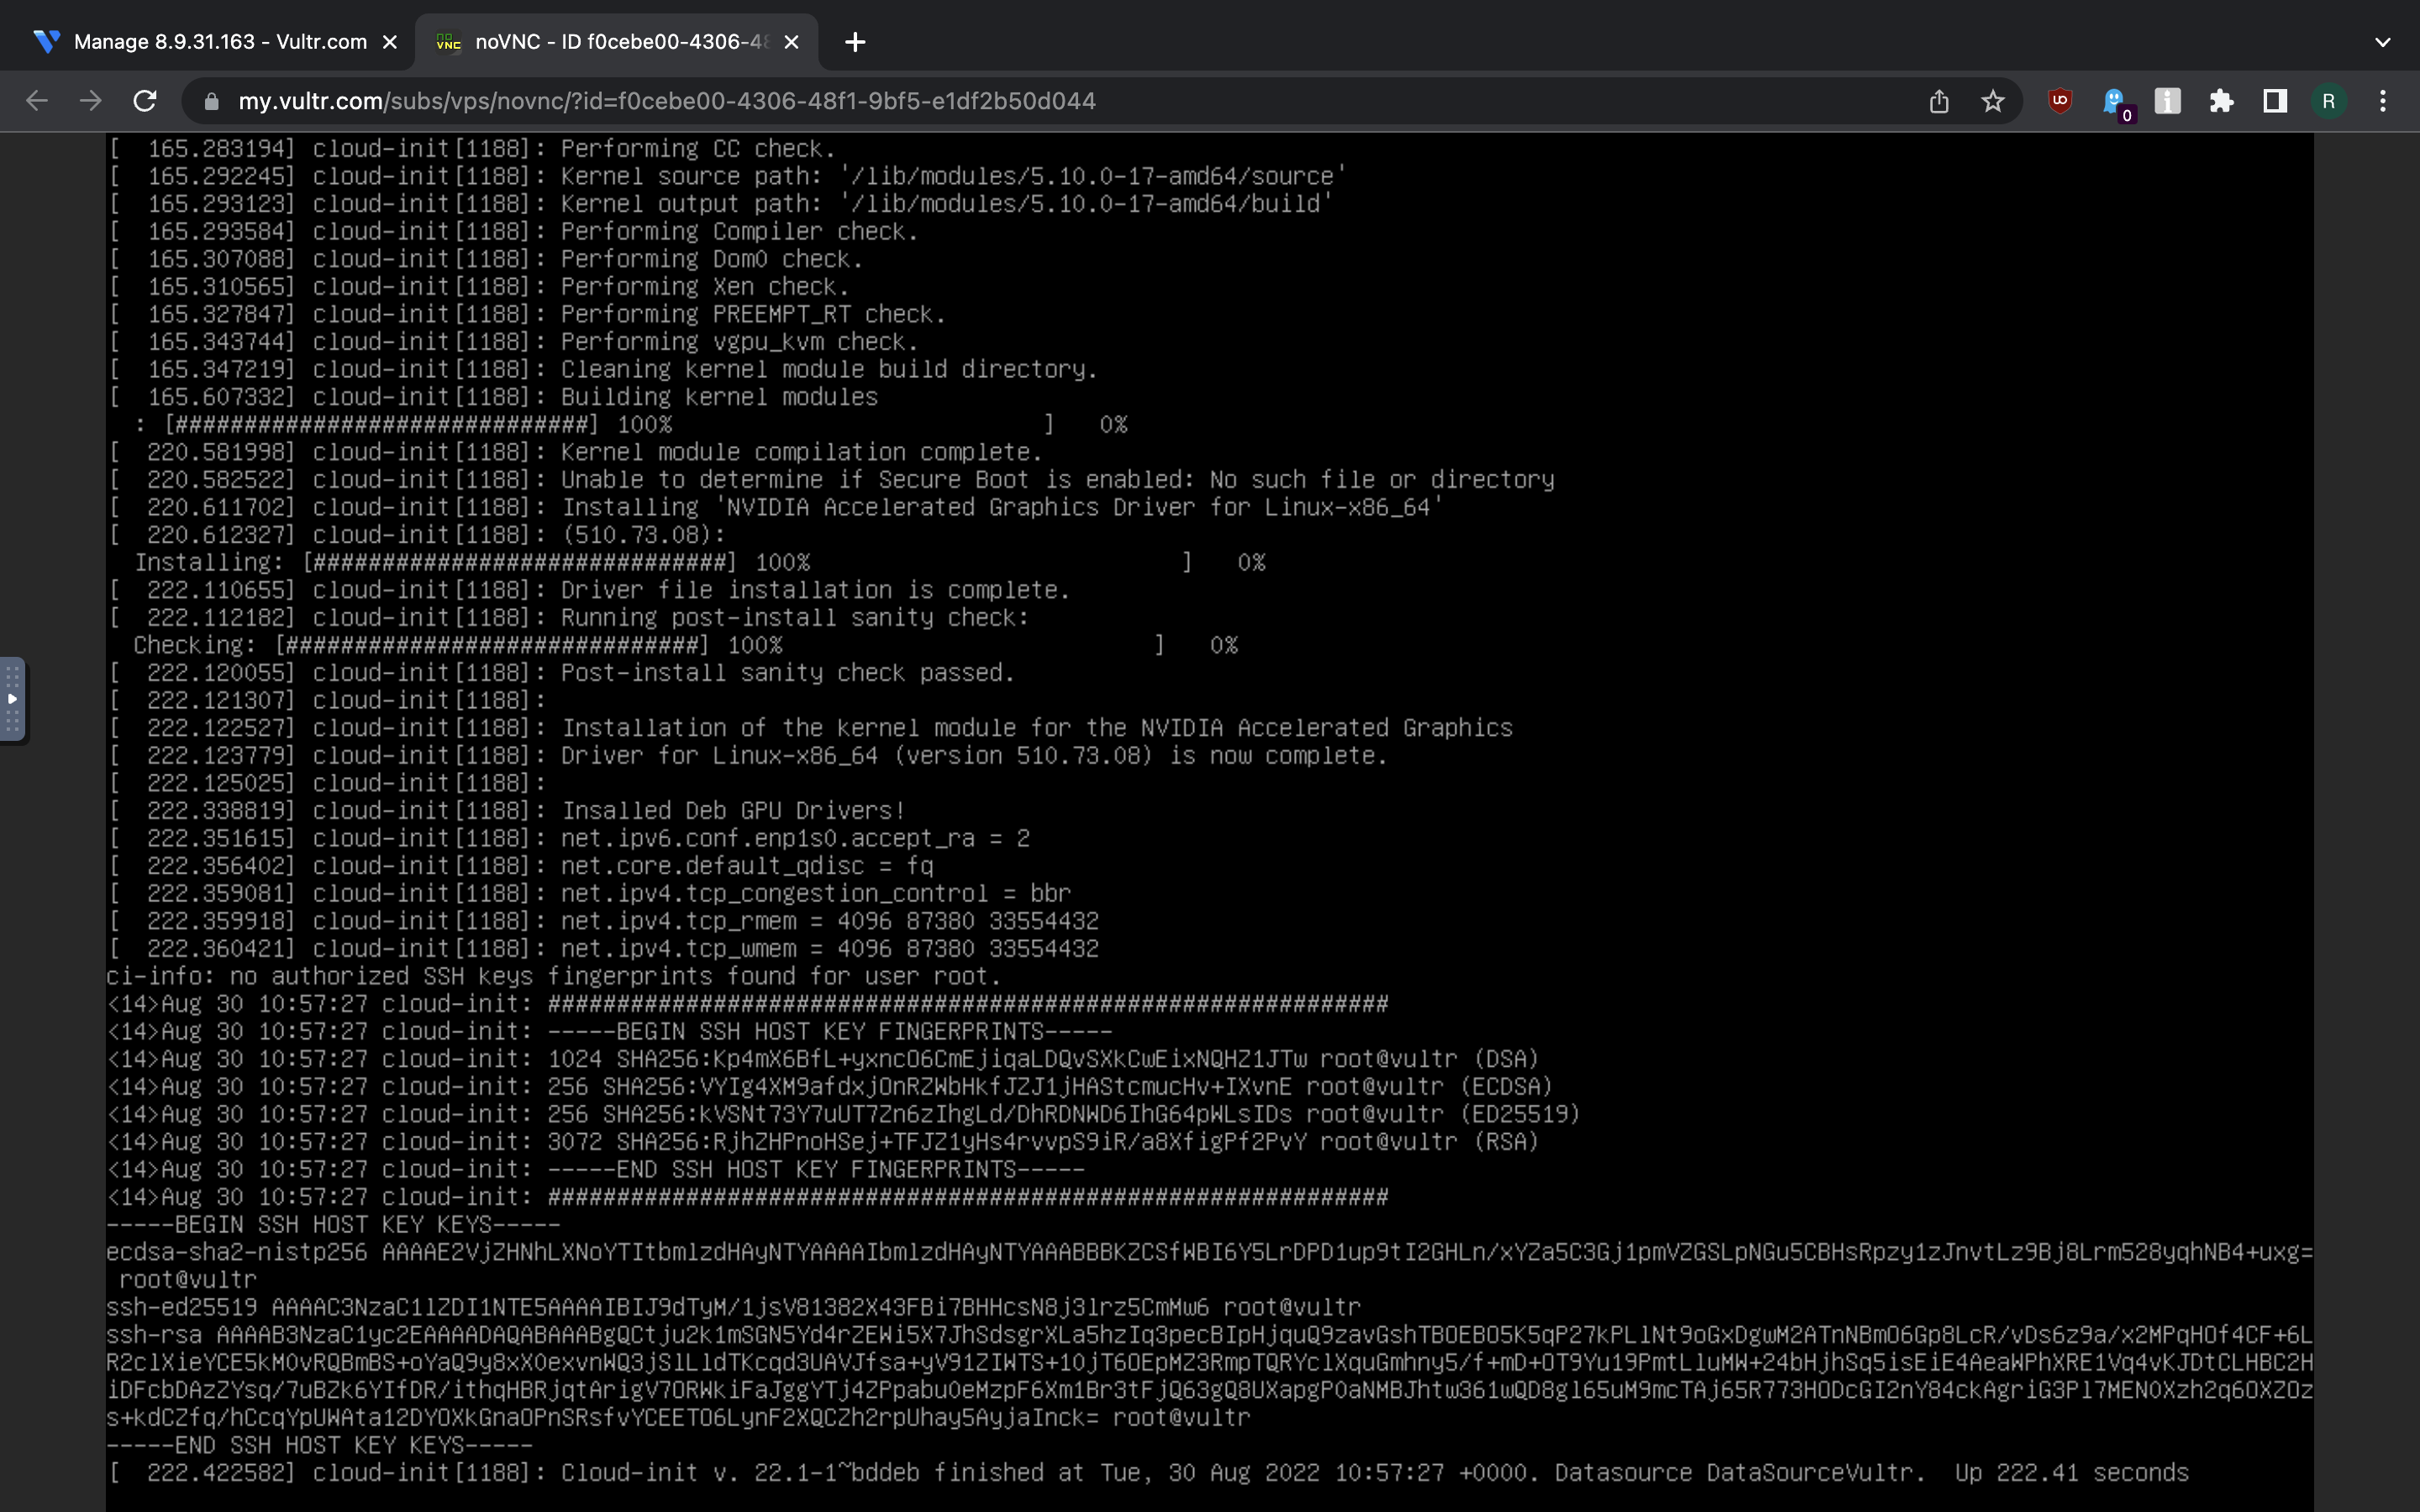
Now it’s time to SSH into the server. We will need to use credentials that are available on the dashboard page for the server we just launched, Overview tab.
Let us install some developer tools from APT, as well as Python interpreter.
# apt-get update
# apt-get install -y git vim tmux
# apt-get install -y python3 python3-pip
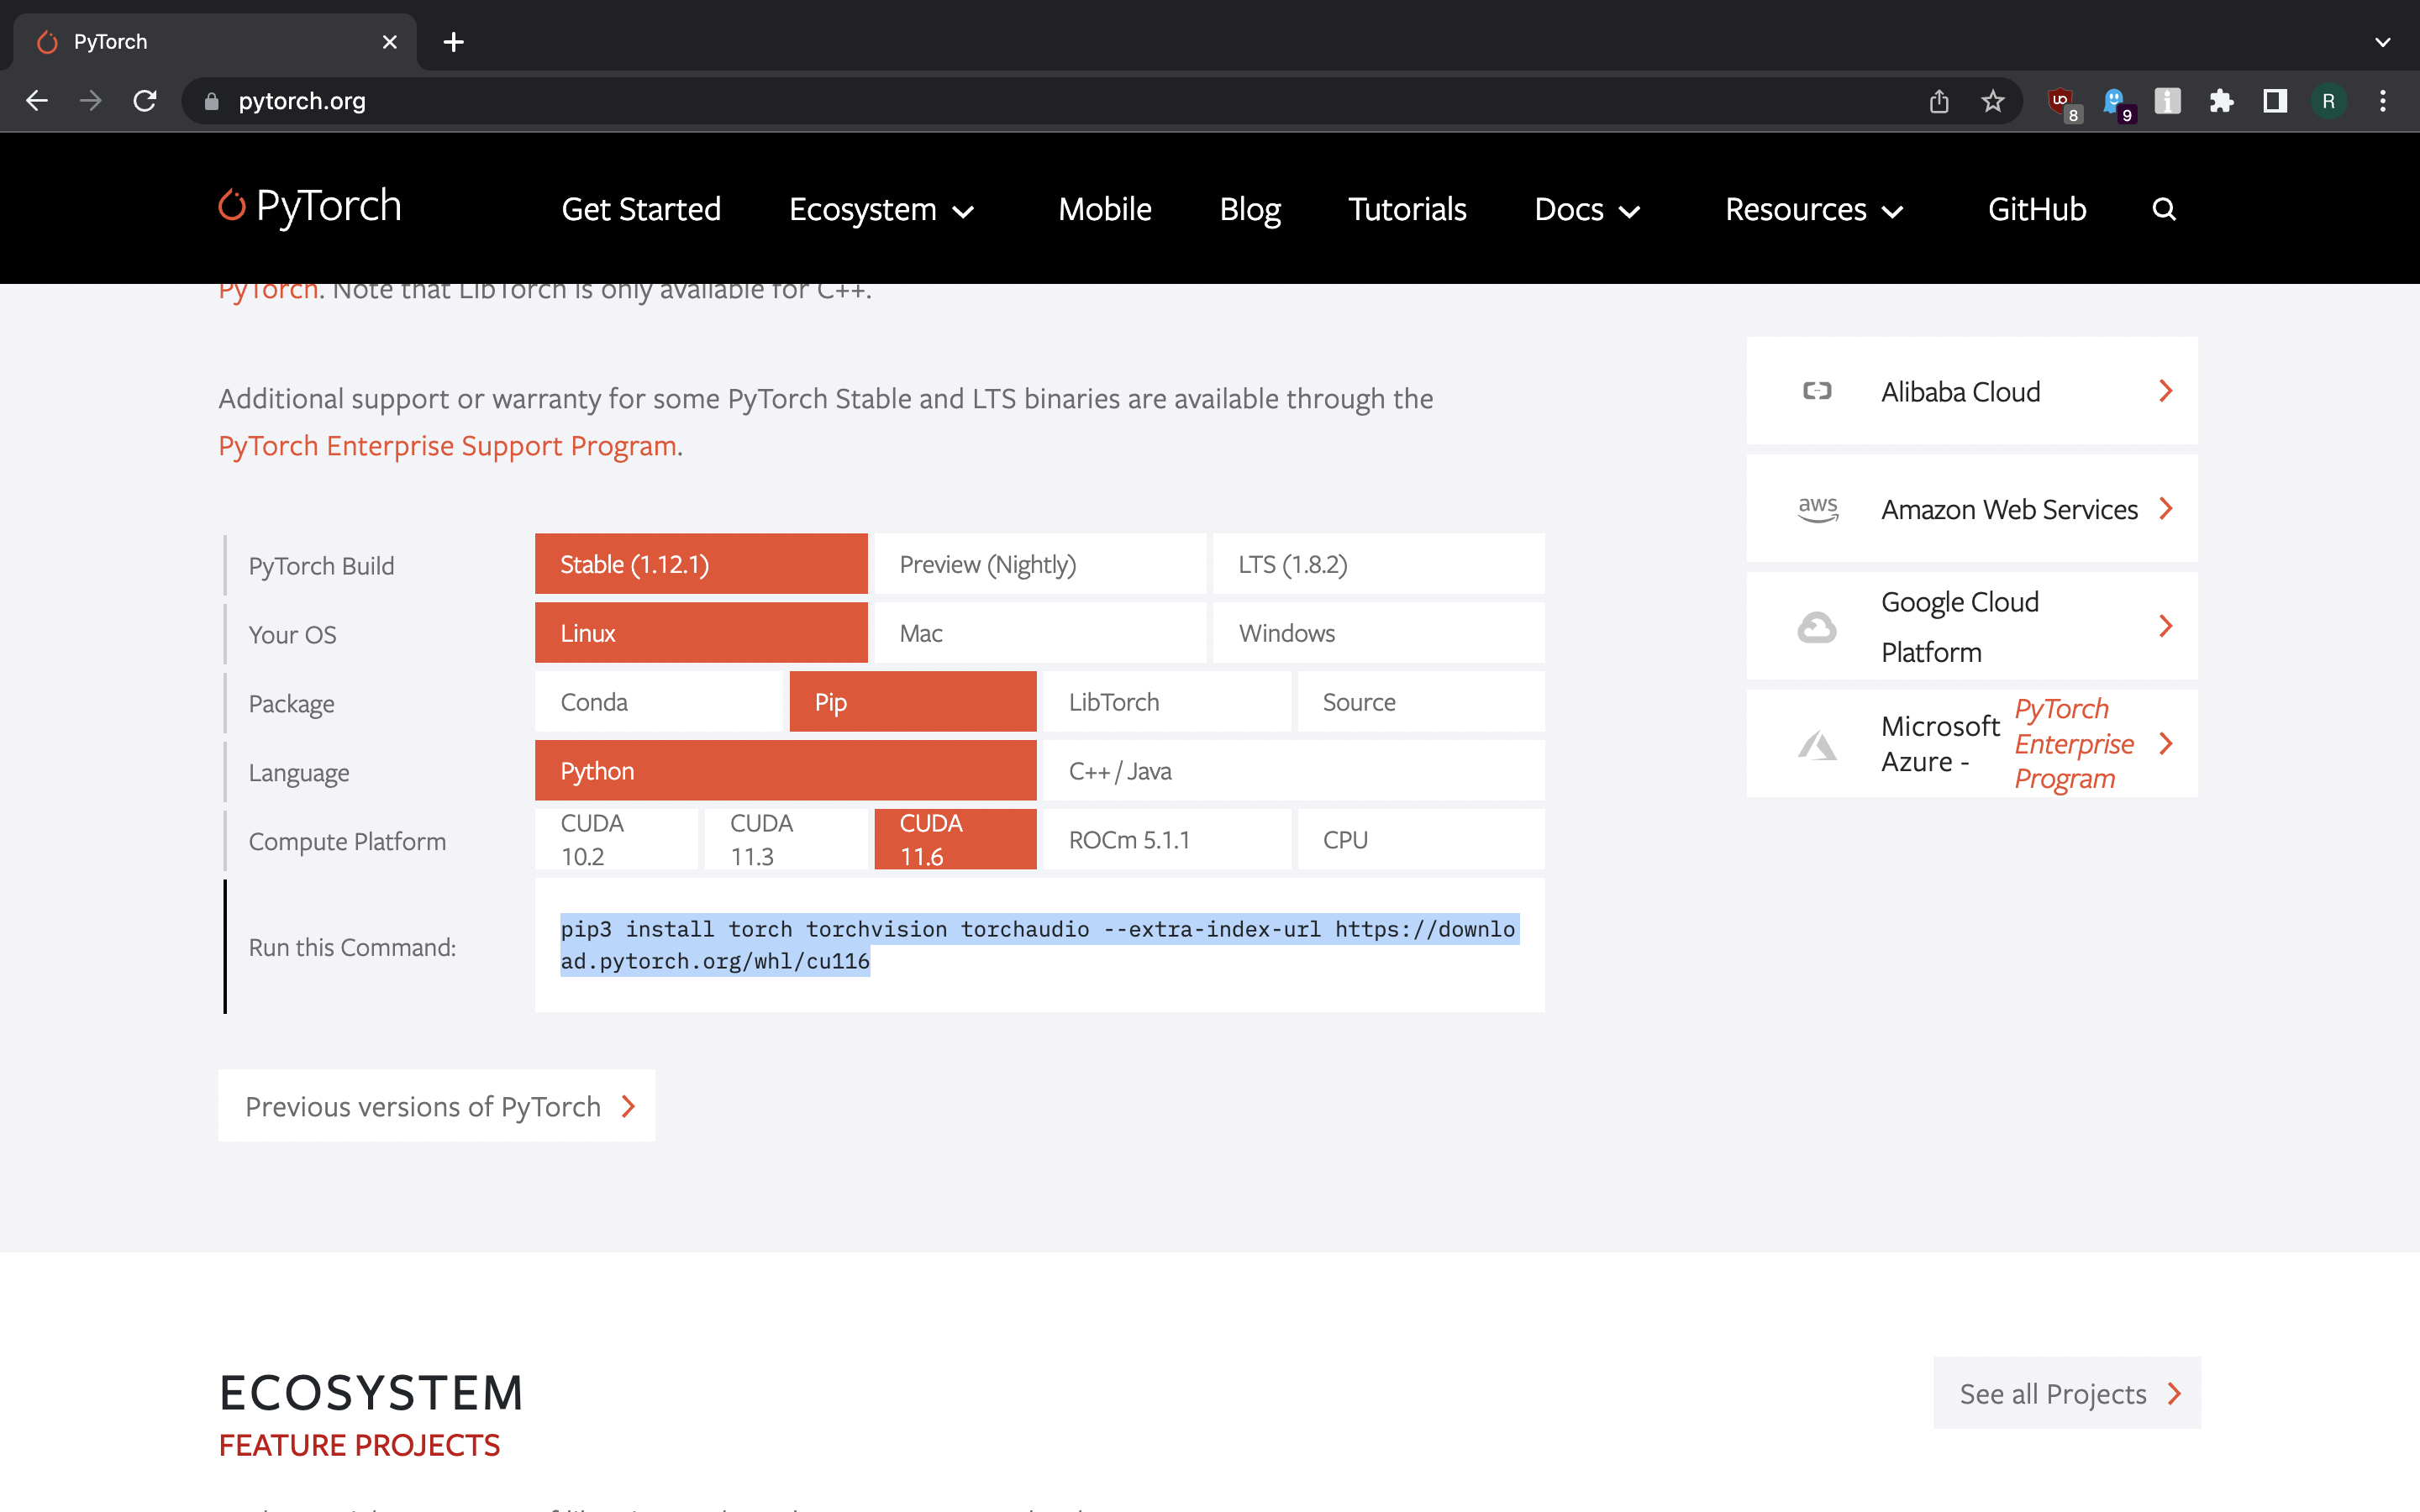
Now we need to install Pytorch, as Stable Diffusion is heavily reliant on that.
On Pytorch homepage we use the little widget to get the exact command we need
to run (CUDA version 11.6 was found by running nvidia-smi on the server):
# pip3 install torch torchvision torchaudio --extra-index-url https://download.pytorch.org/whl/cu116
Now we need to login into Hugging Face, which is a portal similar to Github, but meant specifically for ML community. Make sure you have an account there, go to your account settings and create an access token.
Then install Hugging Face CLI client through PIP and run it to login:
# pip3 install huggingface_hub
# huggingface-cli login
This will ask you to paste in the access token from account settings.
Furthermore, it’s useful to set up git credential helper so that we are not being repeatedly asked to enter git credentials:
# git config --global credential.helper store
Now let us go to Hugging Face page for Stable Diffusion v. 1.4.
It recommends us to install diffusers library via PIP:
# pip3 install --upgrade diffusers transformers scipy
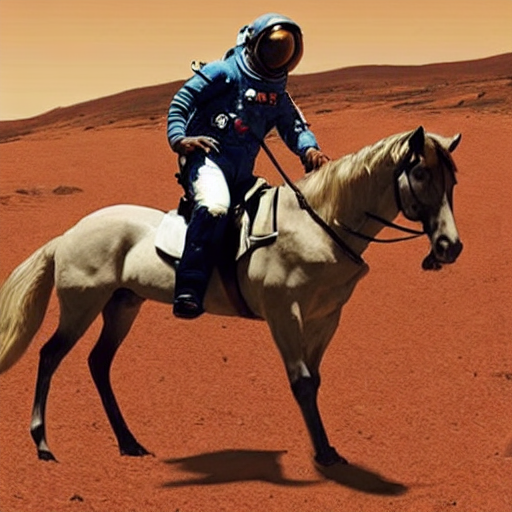
Once we have that installed, we can run the sample code that is provided. One thing I found is that Vultr instance with 10GB of VRAM is still not enough to run image generation at 32 bit floating point precision - one has to lower it to 16 bit. An image of astronaut riding a horse on Mars is successfully generated.
I took the liberty to tweak the sample code from Stable Diffusion project to make it more interactive:
#!/usr/bin/python3

import torch
from torch import autocast
from diffusers import StableDiffusionPipeline


def main():
    prompt = input("Prompt: ")
    filepath = input("Image file path: ")

    model_id = "CompVis/stable-diffusion-v1-4"
    device = "cuda"

    #pipe = StableDiffusionPipeline.from_pretrained(model_id, use_auth_token=True)
    pipe = StableDiffusionPipeline.from_pretrained(
        model_id, torch_dtype=torch.float16, revision="fp16", use_auth_token=True
    )

    pipe = pipe.to(device)

    with autocast("cuda"):
        image = pipe(prompt, guidance_scale=7.5)["sample"][0]

    image.save(filepath)


if __name__ == "__main__":
    main()
If you find that is pain to download output images via SFTP you can run a quick HTTP server within tmux session in your output directory like this:
# ufw disable
# python3 -m http.server
Note that the firewall is being disabled to allow ingress for HTTP requests from outside. Furthemore, I would advise creating new directory for this so that no sensitive information is exposed.
It takes approx. 18 seconds to generate an image on $250/month Vultr instance.
Funnily enough, it censored itself when asked what the origin of mankind looks like:
# python3 sd_gen.py
Prompt: origin of mankind
Image file path: origin-of-mankind.png
ftfy or spacy is not installed using BERT BasicTokenizer instead of ftfy.
51it [00:18,  2.82it/s]
Potential NSFW content was detected in one or more images. A black image will be returned instead. Try again with a different prompt and/or seed.
I guess there was something NSFW involved in that.
Creating Terraform configuration with provisioning script to make the above setup automated for quick installation and teardown is left as an exercise to the reader.