HTTP messages are typically are not sent in plaintext in the post-Snowden world. Instead, TLS protocol is used to provide communications security against tampering and surveillance of communications based on HTTP protocol. TLS itself is fairly complex protocol consisting of several sub-protocols, but let us think of it as encrypted and authenticated layer on top of TCP connection that also does some server (and optionally client) verification through public key cryptography.
In this blog, we have previously discussed setting up mitmproxy to intercept HTTPS communications between mobile apps and their backend systems. However, we may also want to see what desktop apps are communicating. Furthermore, we may want to go deeper into reverse engineering private APIs for web apps and would like to surpass limitations of Chrome DevTools. This is where we turn to Wireshark - a GUI tool for packet sniffing and analysis. We can use this tool for deep dive into what exactly an application is doing on the network.
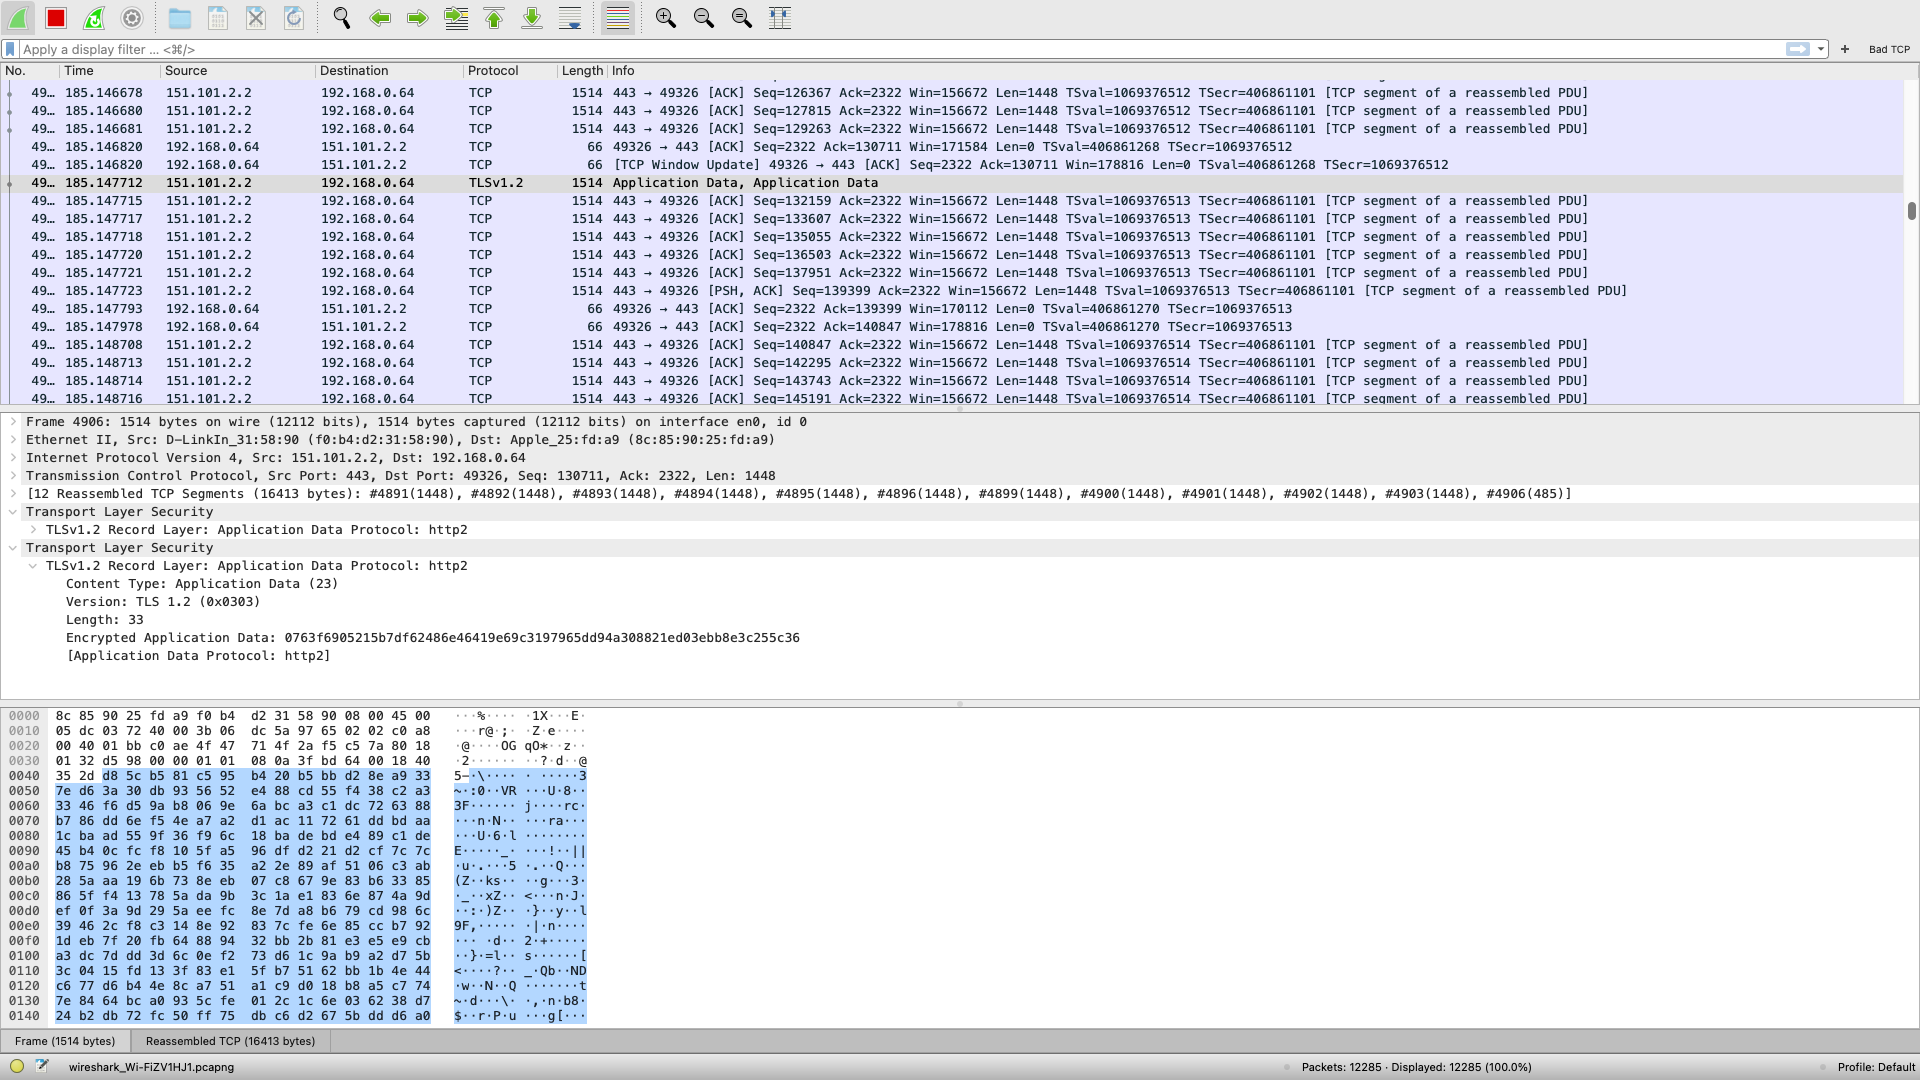
However if we try to sniff HTTPS without any preparations we will not be able to go far, as TLS protocol is doing it’s job to prevent adversaries from reading communication contents by sniffing the network.
However, if we control one of the endpoints (i.e. desktop system with a web browser) we can set
SSLKEYLOGFILE environment variable to a path of textfile we can access. Software that implements
TLS typically (altough not always) will write keys and other TLS secrets to this file. This applies
to curl, Chrome, Firefox and many desktop apps that use NSS/OpenSSL libraries. Wireshark, if configured
correctly, will be able to read this file and decrypt the intercepted TLS packets. This is a client-side
capture of session keys.
How exactly do we set the environent variable? This is dependant on operating system and whether or not we want to cover all apps that are installed. On Linux/Unix that uses Bash we could simply put the following line in ~/.bashrc or ~/.bash_profile file:
export SSLKEYLOGFILE=~/.sslkeyfile
However, this will only cover program launched directly from the shell. On Linux, we could edit /etc/environment (or /etc/profile) and reboot to set the environment variable globally.
On macOS it is somewhat more complicated. First, we need to check if ~/Library/LaunchAgents directory exists and create it under our regular user if it does not. Then we create a Property List file (e.g. tlskeylogger.plist) with the following contents:
<?xml version="1.0" encoding="UTF-8"?>
<!DOCTYPE plist PUBLIC "-//Apple//DTD PLIST 1.0//EN" "http://www.apple.com/DTDs/PropertyList-1.0.dtd">
<plist version="1.0">
<dict>
  <key>Label</key>
  <string>sslkeylogger</string>
  <key>ProgramArguments</key>
  <array>
    <string>sh</string>
    <string>-c</string>
    <string>
    launchctl setenv SSLKEYLOGFILE ~/.sslkeyfile
    </string>
  </array>
  <key>RunAtLoad</key>
  <true/>
</dict>
</plist>
To get it loaded on next restart, we run the following command:
$ launchctl load ~/Library/LaunchAgents/tlskeylogger.plist
To make it immediate, we run the following:
$ launchctl start ~/Library/LaunchAgents/tlskeylogger.plist
On Windows, you can set SSLKEYLOGFILE environment variable via GUI by finding
“Edit environment variables for your account” in Windows menu and creating a new environment
variable for the current user.
Once this is done, we should restart browser and/or other software that communicates over HTTPS. If everything is okay, the file should start to get populated with lines similar to the following:
# SSL/TLS secrets log file, generated by NSS
CLIENT_HANDSHAKE_TRAFFIC_SECRET 7f6e75485ed674e16c83481963f9d65a072c113069d3349639018cdebe5ec154 8cc7626c1516d379e7ba10334b7161b1b95ee2b4455513289ee031d78c007038
SERVER_HANDSHAKE_TRAFFIC_SECRET 7f6e75485ed674e16c83481963f9d65a072c113069d3349639018cdebe5ec154 9cfb00bc3004427de3bbfe005fb32d835cf56ff3c24c3299f5c817f8c8774f0f
CLIENT_RANDOM bea906bf19bf67d0ef1ff7de604f470a73e4ad00a89f62c51adc903c78836342 aadd7d3defb78946d1a22992c9ede2b00a7a4f3add8ce2a3252000818c031887a044358e40665807d6ec813f2fb8d173
CLIENT_TRAFFIC_SECRET_0 7f6e75485ed674e16c83481963f9d65a072c113069d3349639018cdebe5ec154 da25a93b3167179088ebf35b8415bd4f48f0e558ee7db442ed83fba1e31693b9
SERVER_TRAFFIC_SECRET_0 7f6e75485ed674e16c83481963f9d65a072c113069d3349639018cdebe5ec154 4de128f1ab06148bb9faee99e3be590a1c9fd27261dc255de8ec7d59bfa2eccd
EXPORTER_SECRET 7f6e75485ed674e16c83481963f9d65a072c113069d3349639018cdebe5ec154 b1f5242bfe9853f78c41358e602ab6417864ca7fb05f3f5715a641bf263102bd
...
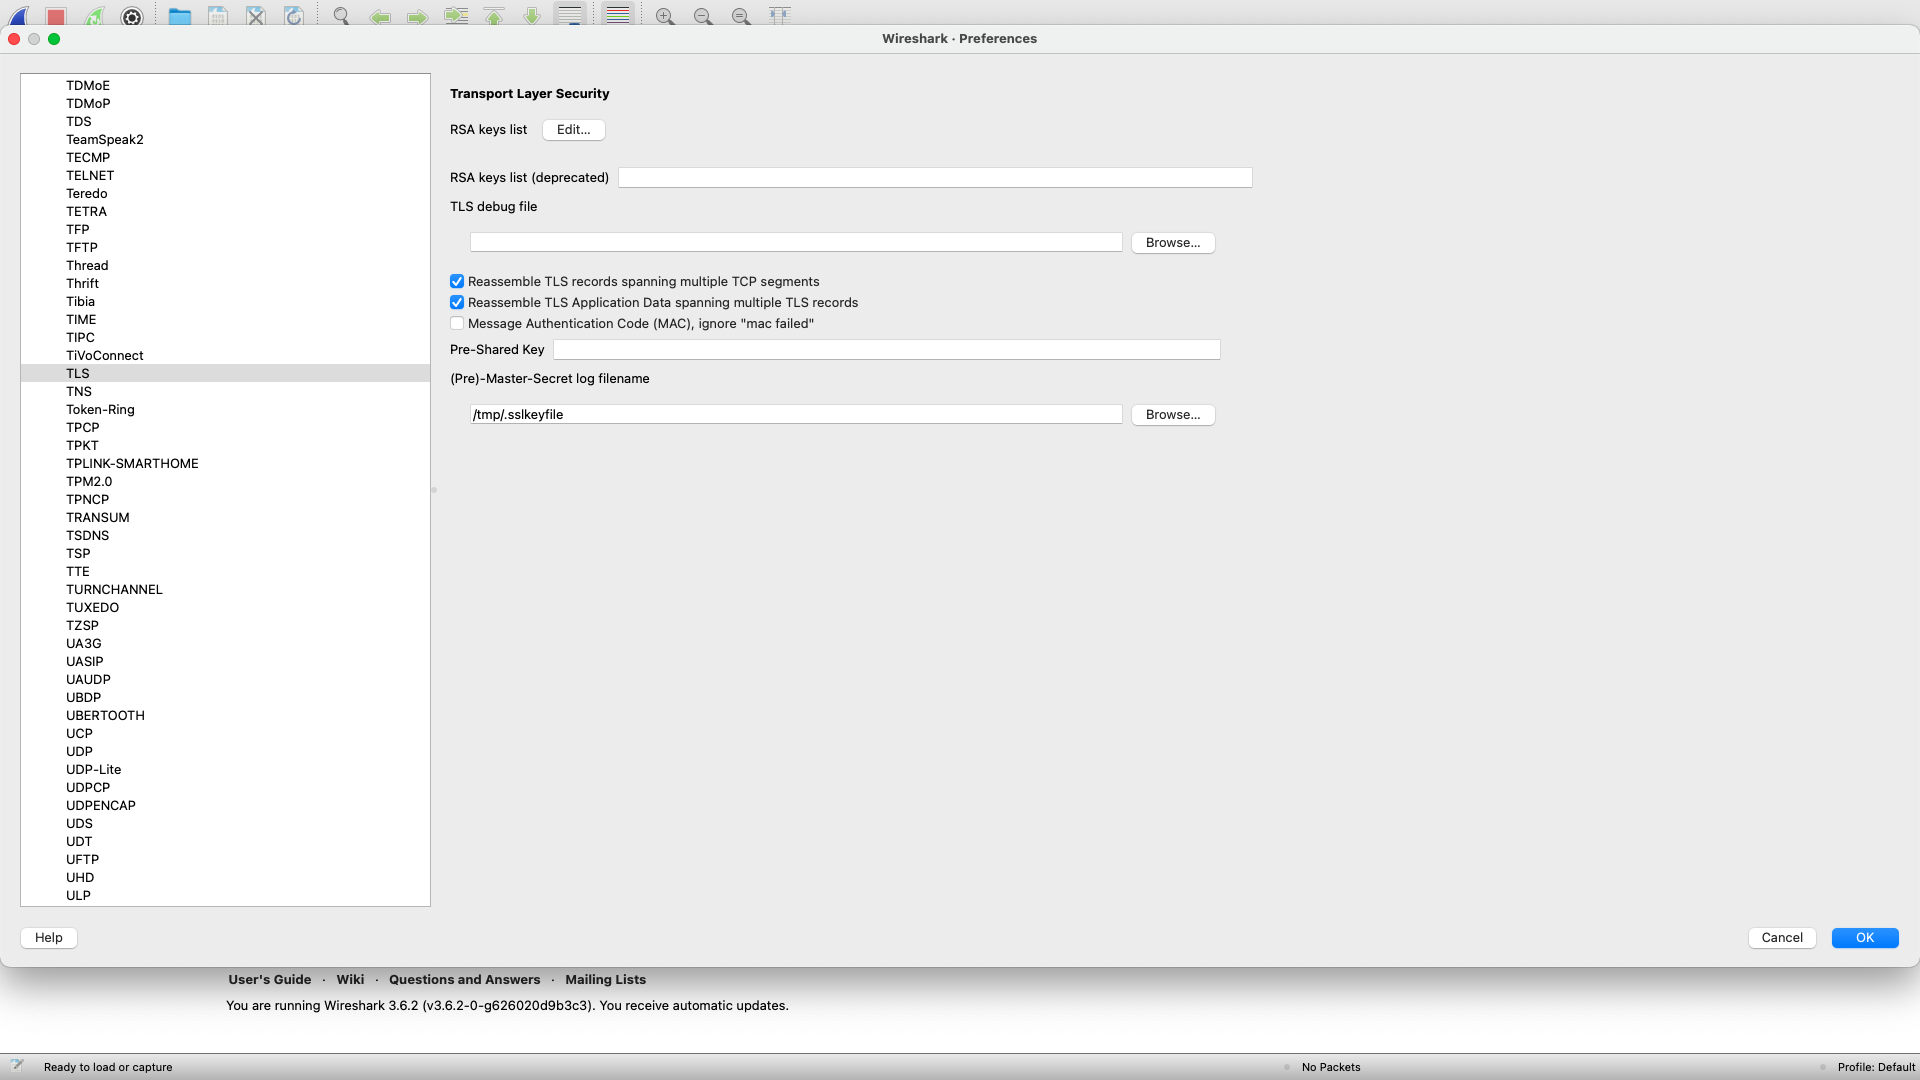
We are ready to configure Wireshark now. This is fairly simple. All we have to do is go to
(Edit ->) Preferences -> Protocols -> TLS and put the value of SSLKEYLOGFILE into
“(Pre-)Master Secret Log filename”. You should also tick checkboxes about reassembling
TLS records and application data.
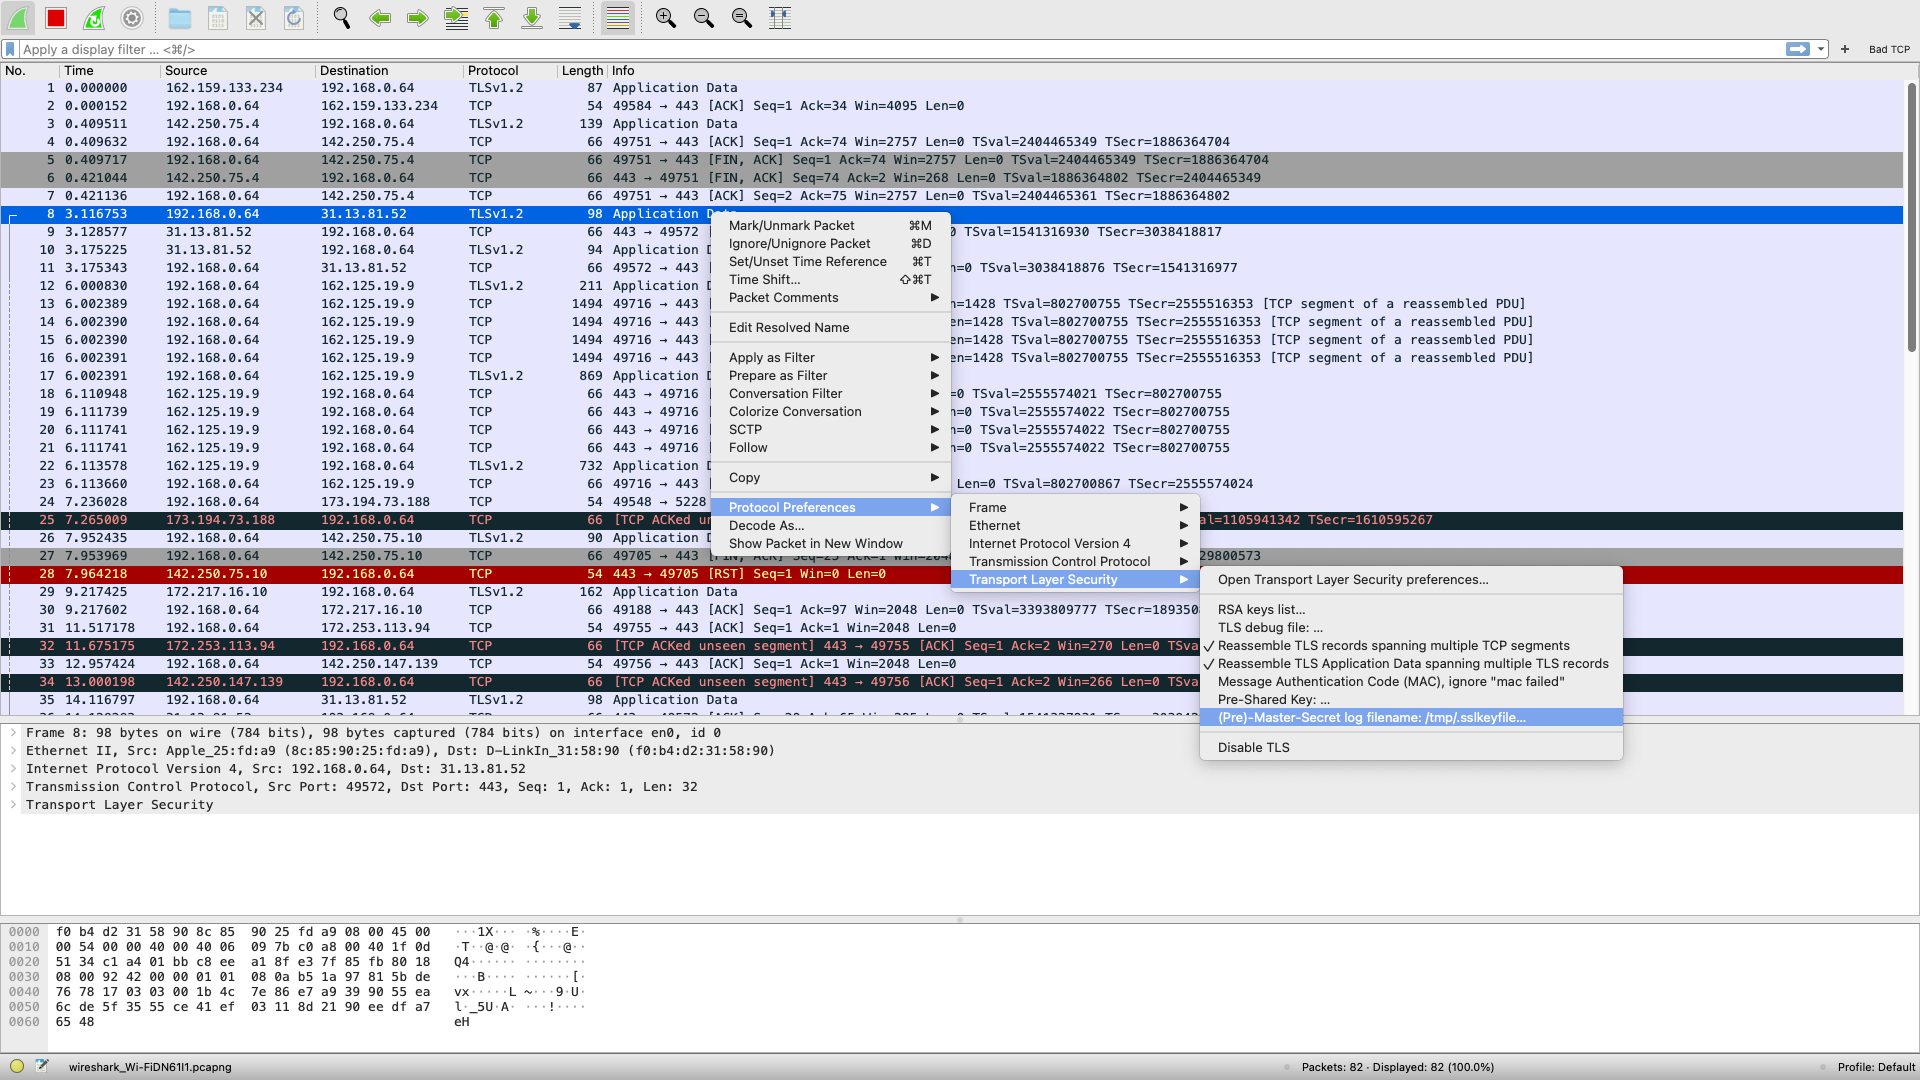
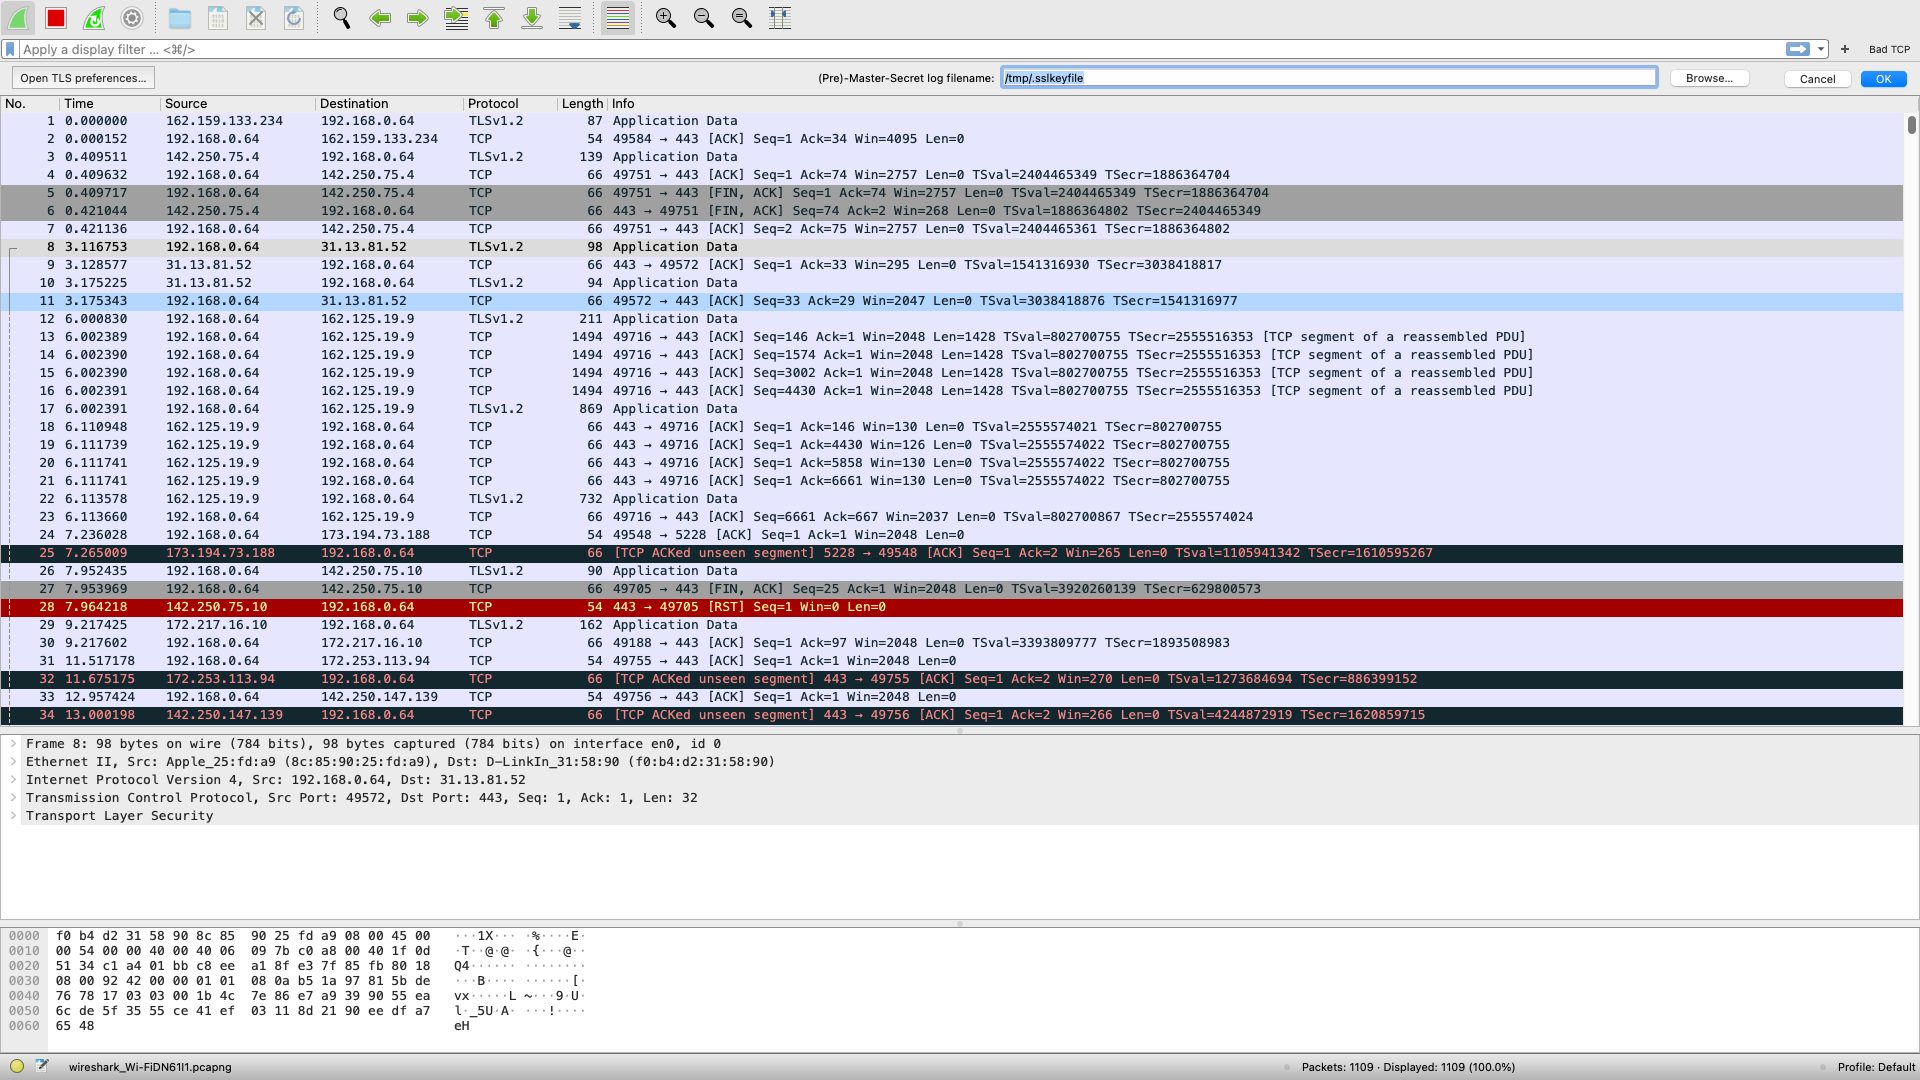
That is one way. Another way is to start sniffing, right click on a TLS packet, then choosing “Protocol Preferences -> Transport Layer Security -> (Pre-)Master Secret Log filename” and clicking that. Wireshark will open a textfield on the top to let you input a path to the file that it needs to read for decryption.
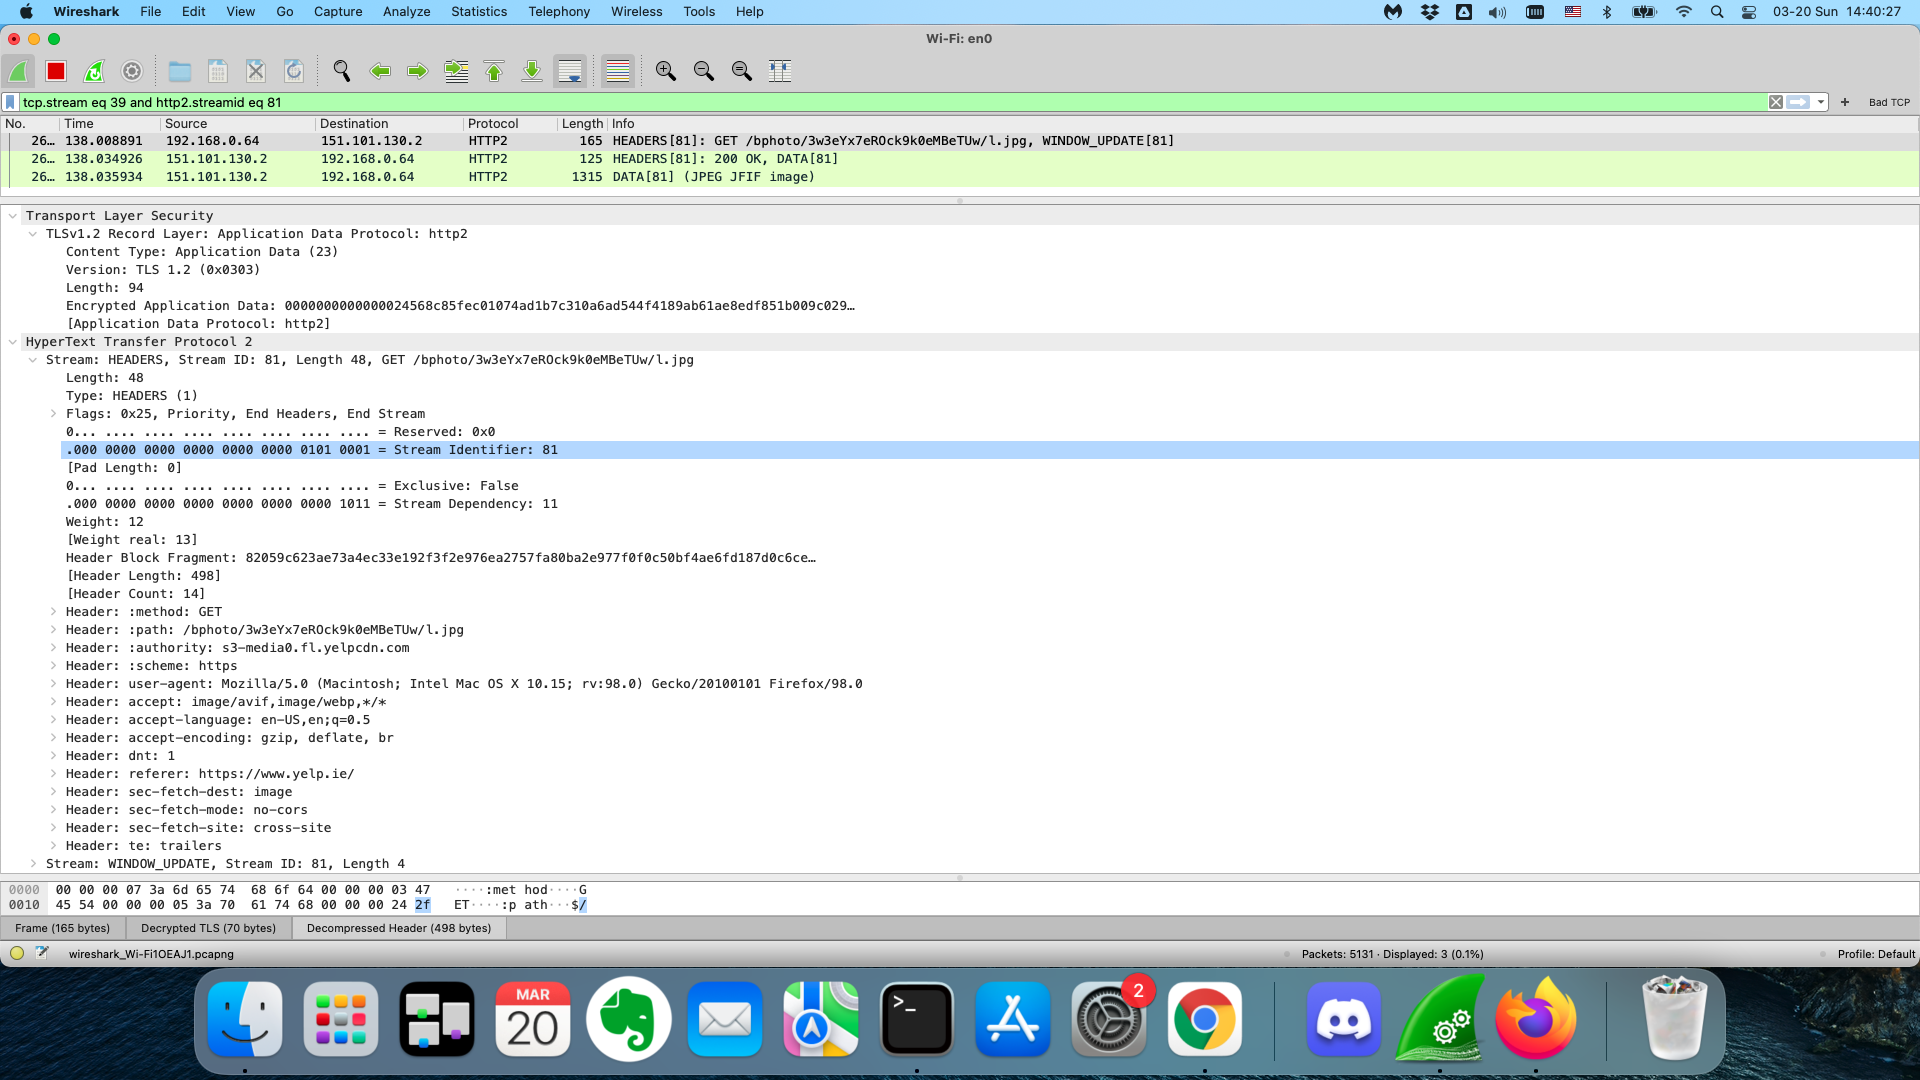
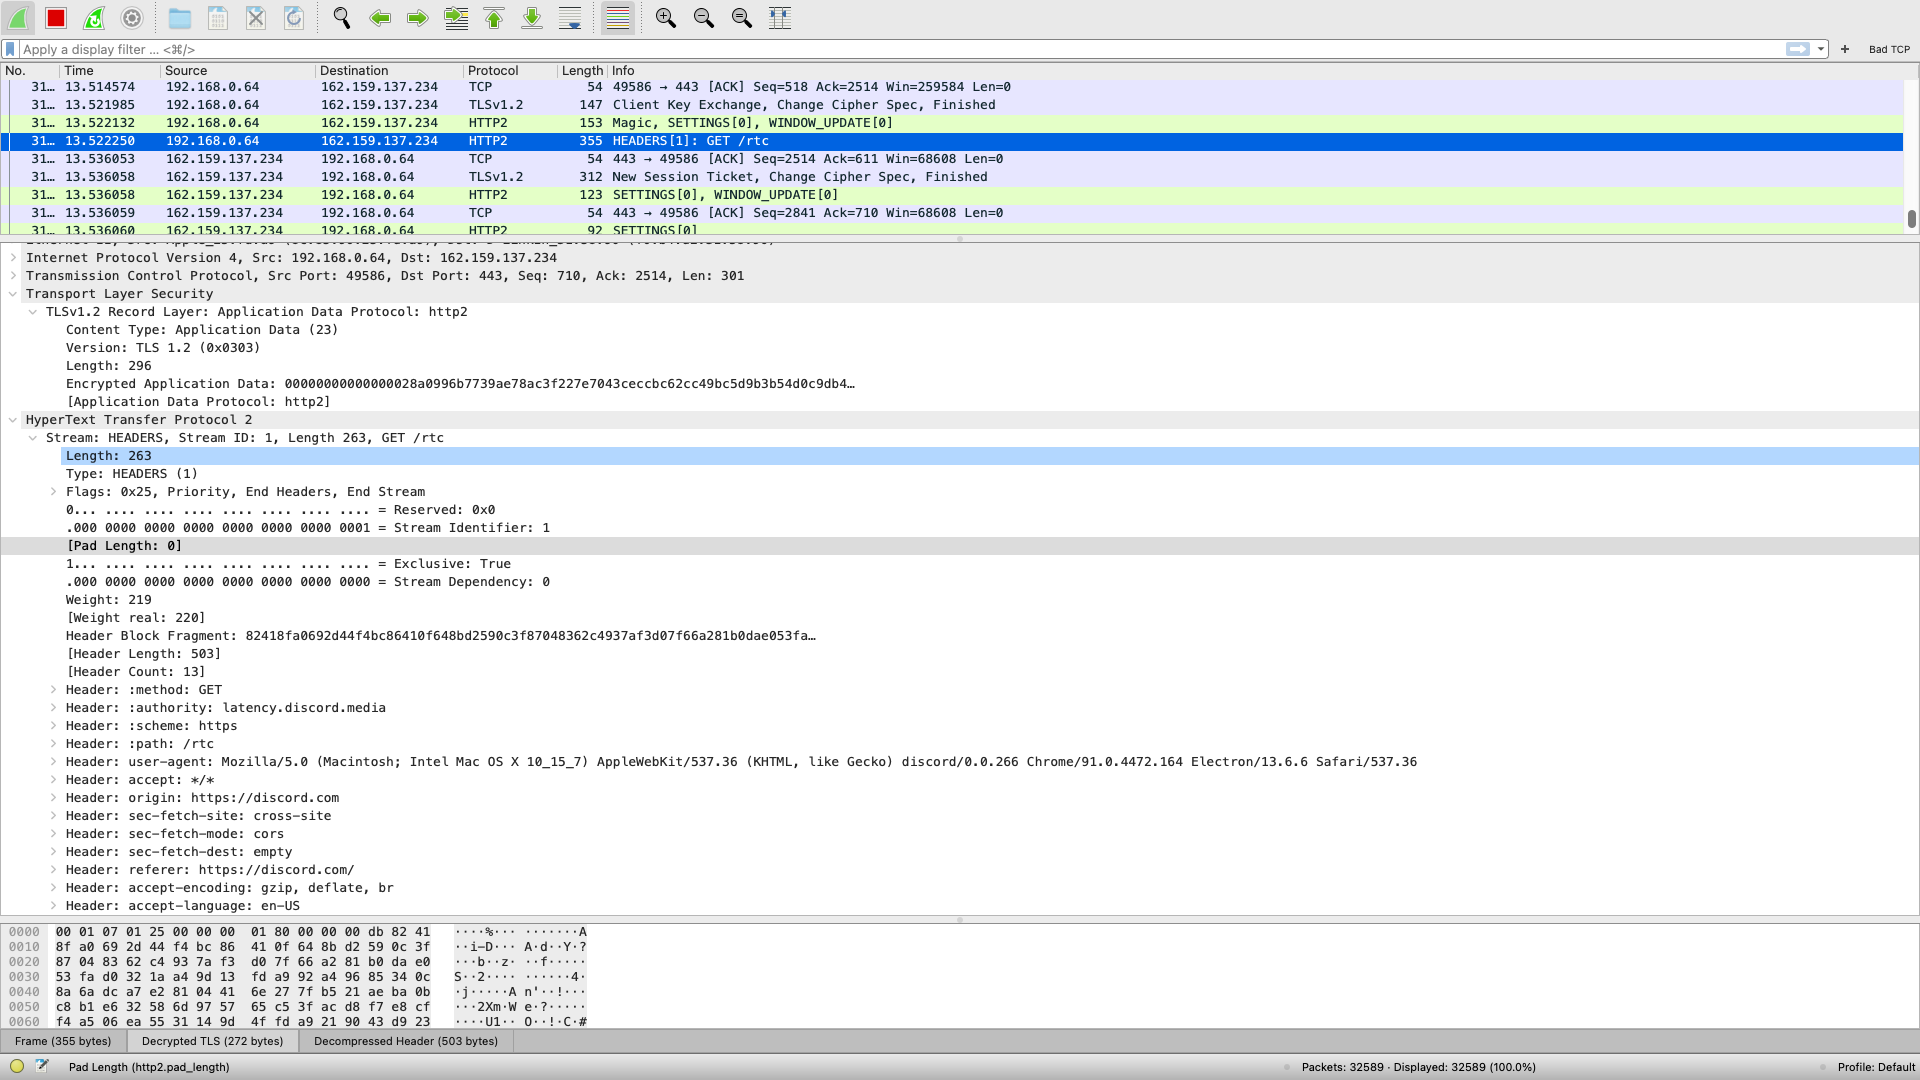
Now we can see HTTPS messages decrypted. This includes some API calls that Google Chrome is making when phoning back to the mothership, as well requests to Discord backend by a desktop Discord client.
Screenshot 5 Screenshot 6 Screenshot 7
This opens up possibilities to not only reverse engineer web app private APIs in a deeper way, but also to do the same kind of research against desktop apps for purposes such as data scraping, automation, vulnerability research and privacy analysis.